When black marks return, look past the surface. The joint may be staying wet, the silicone may have started to fail, or water may be reaching it from somewhere else. In this guide, we show you how to separate those problems before you clean or reseal again.
More than one problem can exist at the same time. A shower corner can hold water every day while the silicone bead—the visible line of sealant around the joint—also starts pulling away from the surface. Replacing the visible line without changing the wet condition often brings you back to the same problem. That is why we start with the joint and the water pattern before product choice.

1. Look at the Silicone Itself
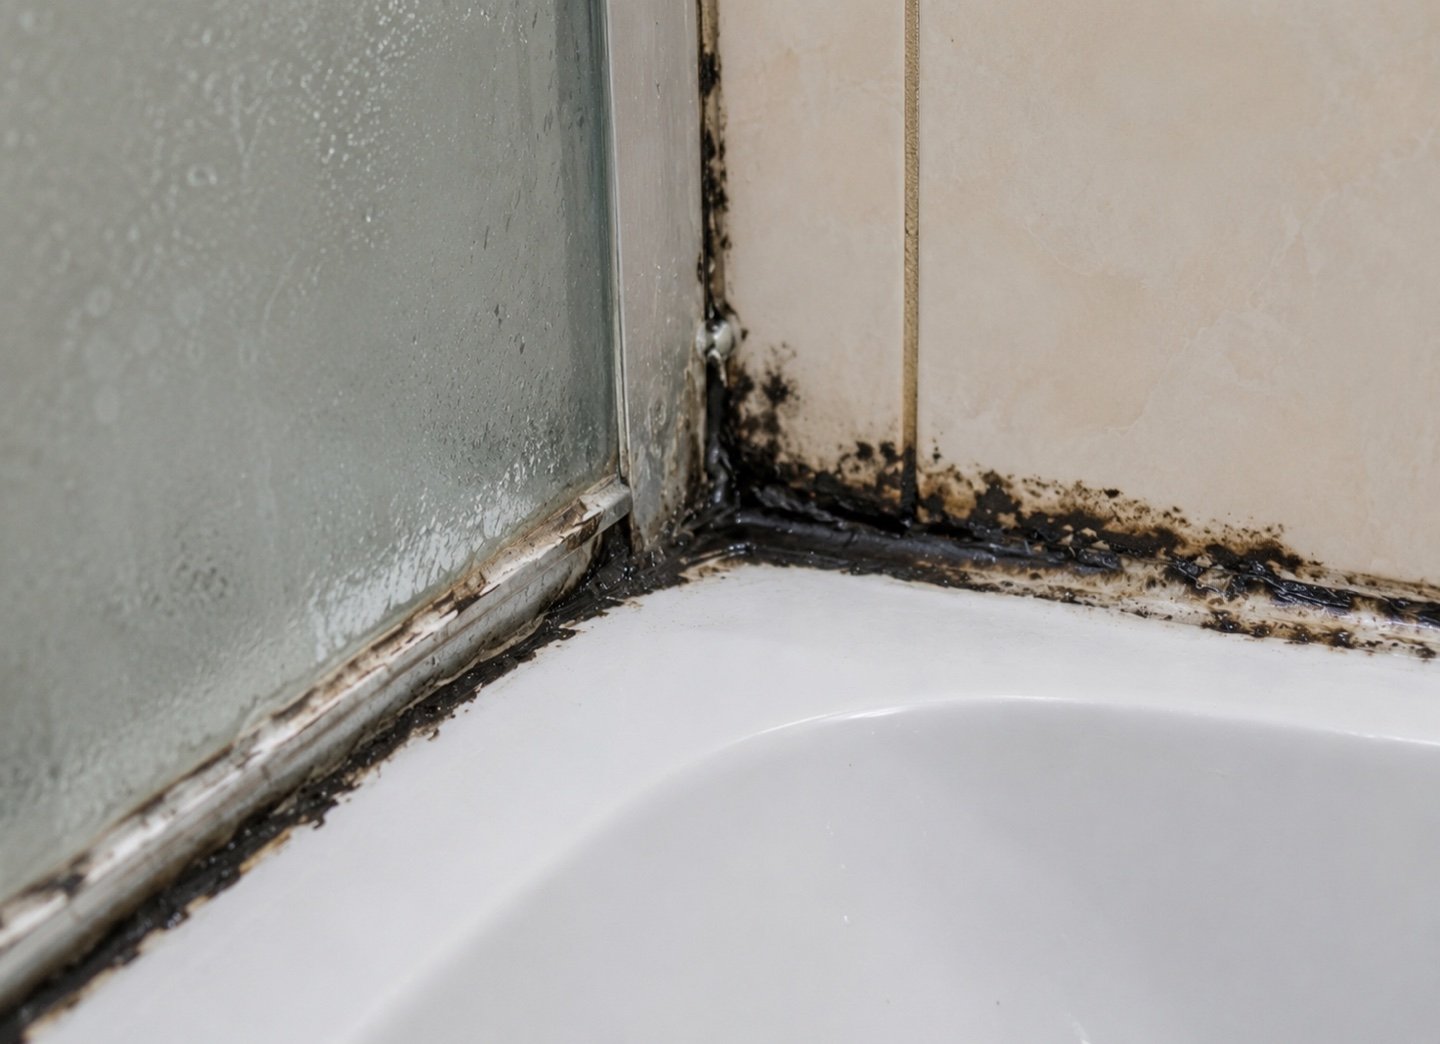
Start with the joint before focusing on the black marks. Is the silicone continuous and firmly attached along both edges? Or can you see a split, gap, peeled edge or section that moves away from the tile, tub, shower tray or glass?
If the silicone is split or peeling, cleaning cannot restore the bond. Take one photo of the whole joint and one close-up, then identify the two materials the silicone joins. Those details matter when you choose the replacement product and check whether the joint itself needs attention.
An intact line points you toward water exposure and bathroom drying. A failed line means the joint condition must be addressed as well.
2. See Where Water Sits
Check the joint after a normal shower. Water often remains in a low corner, along a horizontal seam or behind a layer of soap residue. Compare that area with the place where the dark marks return first.
The useful question is not simply, “Which cleaner should I try next?” It is, “Does this spot stay wet almost every day?” If the answer is yes, cleaning the surface without changing the water pattern leaves the main condition in place.
Look for simple causes: a corner that does not drain, a shelf or trim detail that directs water onto the silicone, or residue that keeps the surface damp. Use only cleaners that are compatible with the silicone and the surrounding surfaces.
3. Check Whether the Bathroom Actually Dries
A bathroom can look dry while the joint remains damp between uses. After bathing or showering, check whether:
- the exhaust fan vents outdoors;
- steam and condensation remain for a long time;
- the silicone is still wet before the next use; and
- towels, screens or stored items block airflow around the joint.
Ventilation matters because it shortens the time water stays on the surface. We are not looking for one magic fan time or humidity reading. We want to know whether the room and the joint reliably dry between wet cycles.
4. Rule Out a Leak Behind the Joint
Some recurring “moldy silicone” complaints are really water problems around the joint. Check for a known plumbing leak, damp or stained finishes, soft material, or water appearing from beside or behind the silicone.
A new bead cannot fix water entering from plumbing or another part of the assembly. If water is coming from behind the joint, or the wall, trim or cabinet stays damp, call a plumber or bathroom repair professional before resealing it.
5. Choose a Silicone With Documented Mold Resistance
Start with the latest Technical Data Sheet for the exact product. It tells you whether the silicone was designed for sanitary or wet-area joints, which materials and conditions it covers, and what mold-resistance result it achieved.
Our MR350 Mold-Resistant Sanitary Silicone is a one-component alkoxy-cure sanitary silicone for non-structural wet-area joints. In the MR350 TDS, we report Grade 0 mold resistance under JC/T 885-2016.
What Grade 0 Means in the MR350 Test
MR350 achieved Grade 0 in a commissioned mold-resistance test under JC/T 885-2016. A transparent MR350 sample was evaluated against eight listed fungal strains, including Aspergillus niger, Cladosporium herbarum and Penicillium citrinum. When the sample was examined at 50× magnification, no fungal growth was observed.
The results are graded on a 0-to-4 scale. Grade 0 means no fungal growth was observed at 50× magnification. Grade 1 begins when trace growth covers less than 10% of the specimen surface. We publish this Grade 0 result in the MR350 TDS, so you can verify the tested performance directly.
When you choose MR350 for a bathroom project, pair its documented mold resistance with a joint that drains, dries between wet cycles and remains properly bonded.
We publish the MR350 TDS in Vesta Technical Resources. If you are still deciding between product types, read Sanitary Silicone vs General-Purpose Silicone or start with the Kitchen & Bath application guide.
What to Do Next
| What you found | What to do |
|---|---|
| The silicone is intact, but one area stays wet or collects residue | Change the water and drying conditions, then maintain the surface according to the product and finish instructions. |
| The silicone is split, peeling or gapped | Photograph the joint, identify both materials and assess the failed joint before choosing replacement silicone. |
| Water appears from behind, or nearby finishes stay damp | Find the water source and correct it before resealing. |
| You do not know which product was used | Identify the cartridge and compare its TDS with the bathroom application. |
| The joint needs a sanitary wet-area silicone | Compare the application and both materials with the MR350 TDS. |
What to Send Our Application Support Team
If you would like us to review the application, contact our Application Support team with:
- one photo of the full joint and one close-up;
- the bathroom location and what the joint is sealing;
- the two adjoining materials and their finishes;
- whether the silicone is intact, split, peeling or gapped;
- where water sits and how the bathroom normally dries;
- the product name or TDS, if available; and
- your country, and whether this is a home repair, commercial project or distribution enquiry.
We can review the application, check the relevant documents and advise whether product testing or a sample is needed.